How to Blur a Background in Lightroom (Step by Step Guide)
The blurred background effect is a popular trick used in photo editing to highlight and make the portrait stand out from the background.
This effect is widely used in fashion and wedding photography. It works best for portraits as it makes portraits pop from the background. While the effect is best created with your camera, you can also replicate it with Lightroom.
In this quick guide, we’ll show you how to blur background in Lightroom to recreate the same effect in your own portrait photos.
Let’s get started!
2 Million+ Lightroom Presets, Add-Ons, Actions + More
Download hundreds of Lightroom presets, Photoshop actions, and thousands of design assets with an Envato Elements membership. It starts at $16 per month, and gives you unlimited access to a growing library of over 2,000,000 presets, add-ons, templates, fonts, photos, graphics, and more.
How to Blur Background in Lightroom Classic
You can create this effect in both Lightroom Classic and CC. We’ll start with Lightroom Classic.
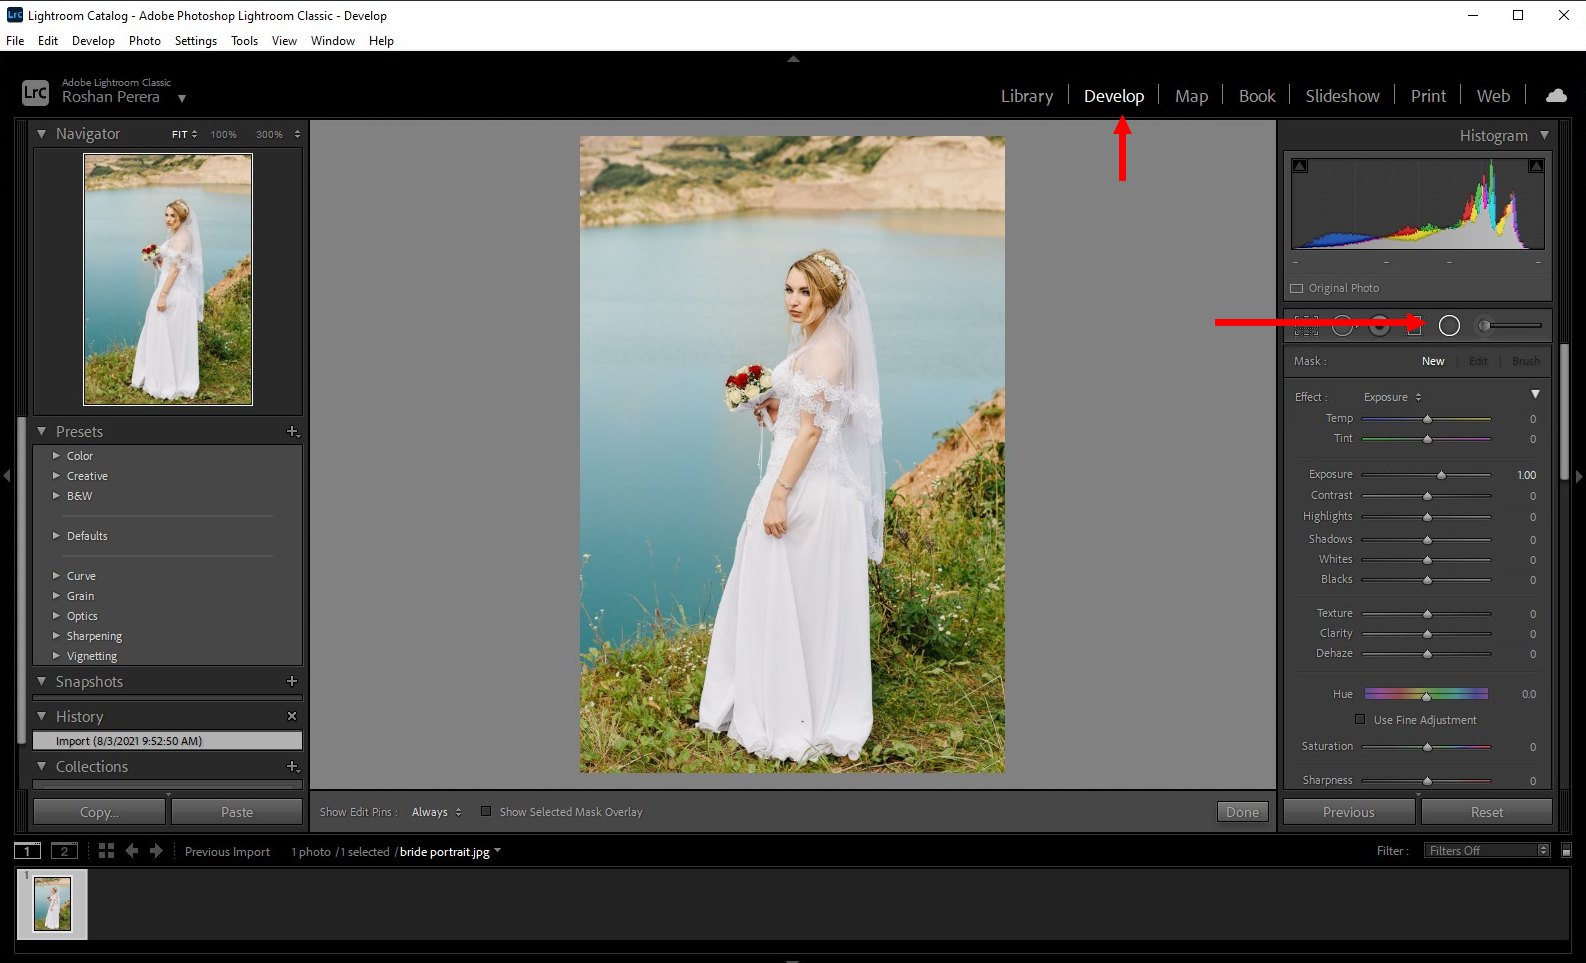
First, open your photo in Lightroom and switch over to the Develop Module. Then select the Radial Filter tool.
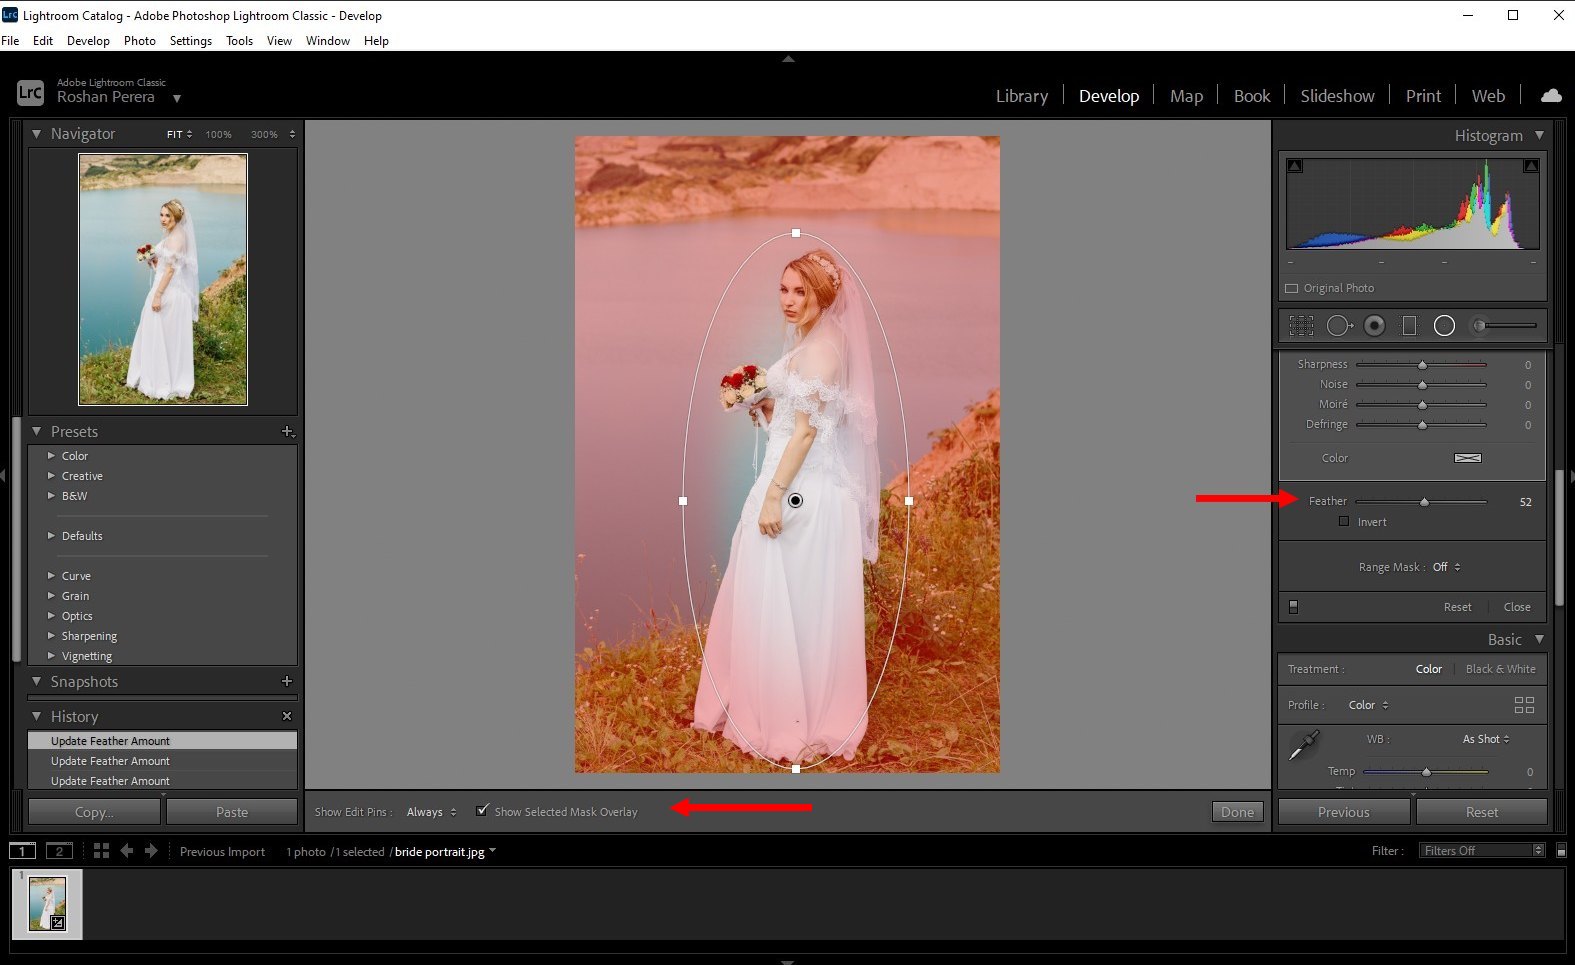
Now create a Radial Filter around the person or object in the photo. Tick the “Show Selected Mask Overlay” box to see the selection.
Once you create a Radial Filter, everything outside the selected area is affected by any of the adjustments you make.
Scroll down on the adjustments to find the Feather adjustment. Change the Feather intensity to adjust the selected area of the Radial Filter.
As you can see, the selection seems to have affected some areas of the bride. You’ll have to clear that out.
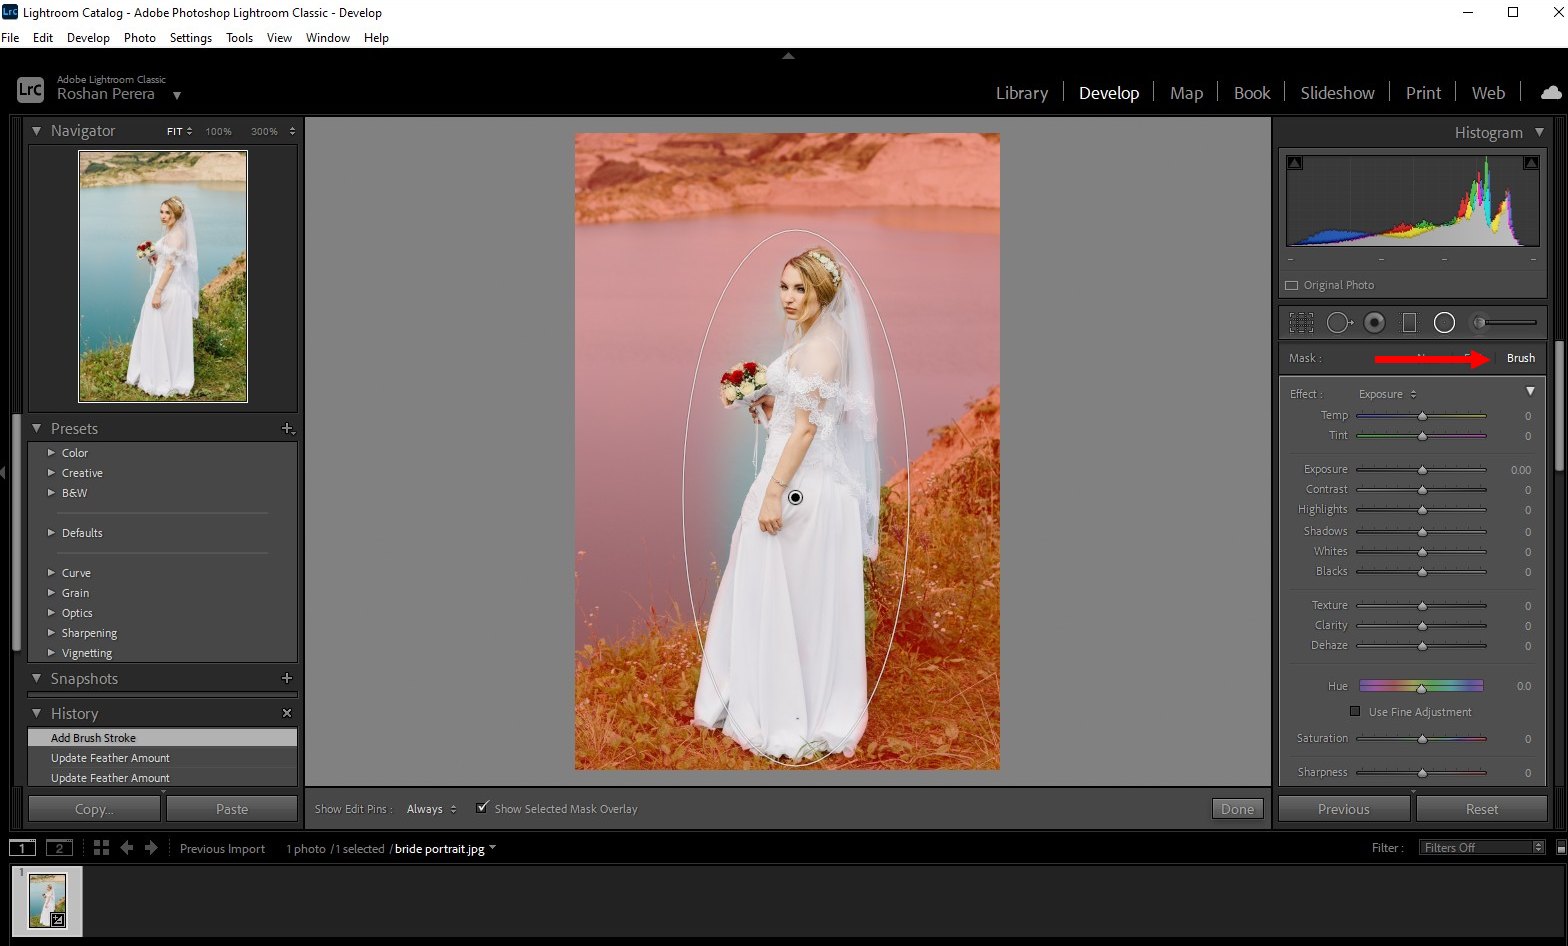
Switch over to the Brush mode and while holding the Alt key on the keyboard, brush over the areas of the selection you want to remove. Or use the brush to expand and add areas to the selection.
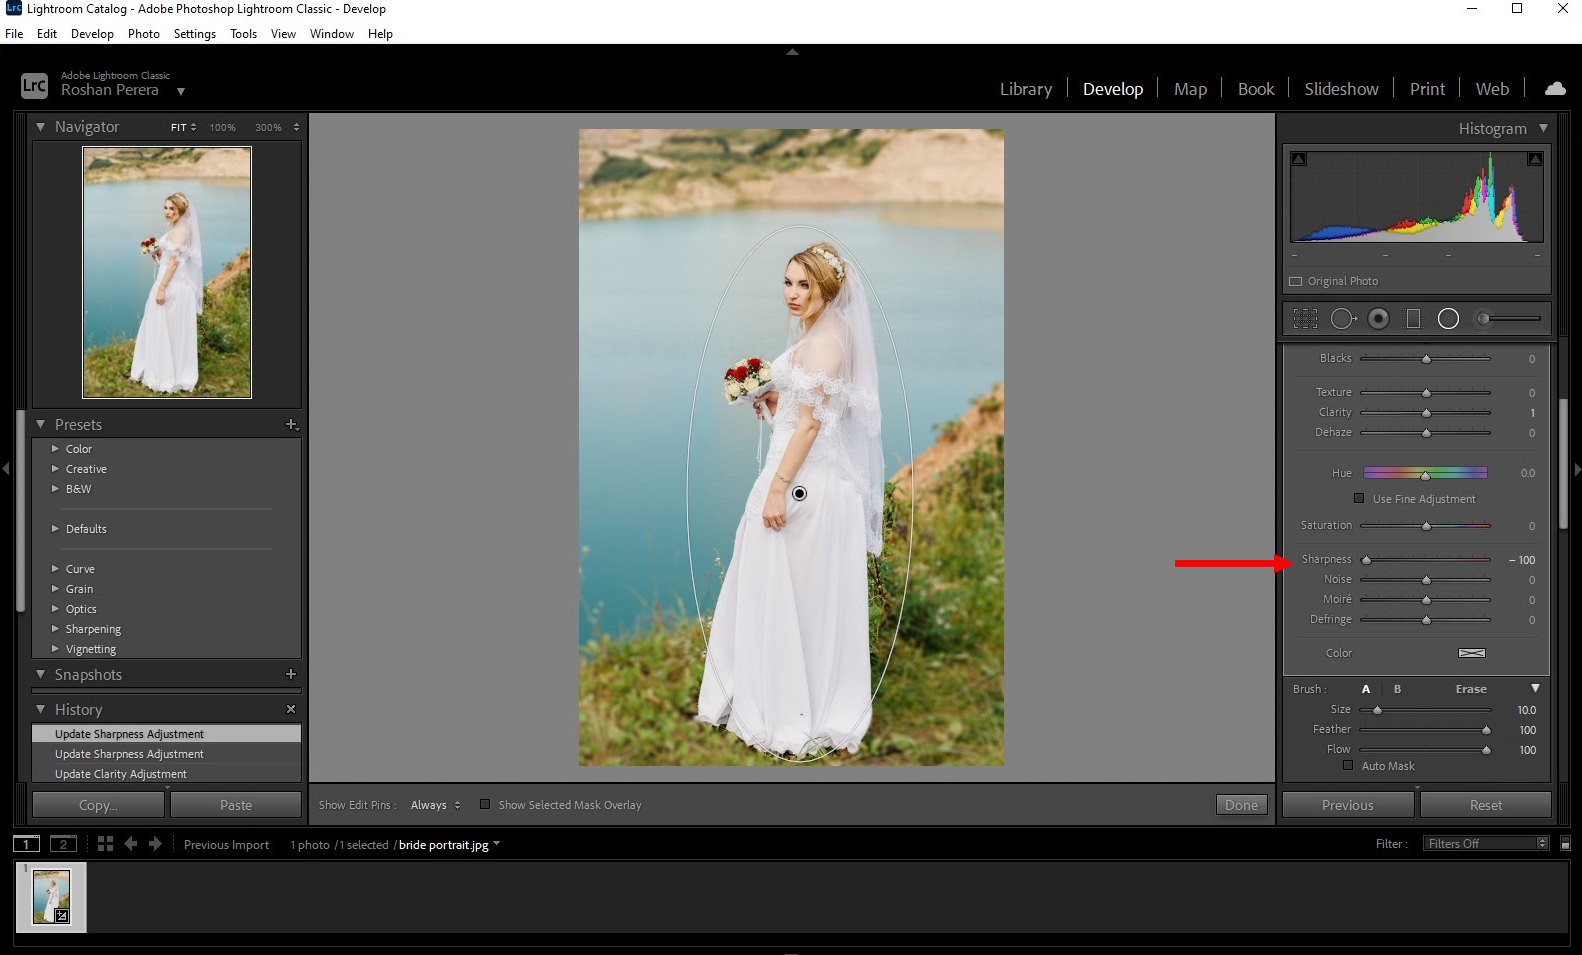
Now it’s time to apply the blur effect. All you have to do now is to reduce the Sharpness adjustment. Adjust it to your preference and you’ll notice the blur effect appear.
Once again, use the brush to add blur to missing spots in the photo.
Note: The effect will be very subtle in high-resolution photos. In such cases, you can stack the Radial Filter multiple times to increase the intensity of the effect.
How to Blur Background in Lightroom CC
The effect can be applied in Lightroom CC by following the same steps as you did in Lightroom Classic.
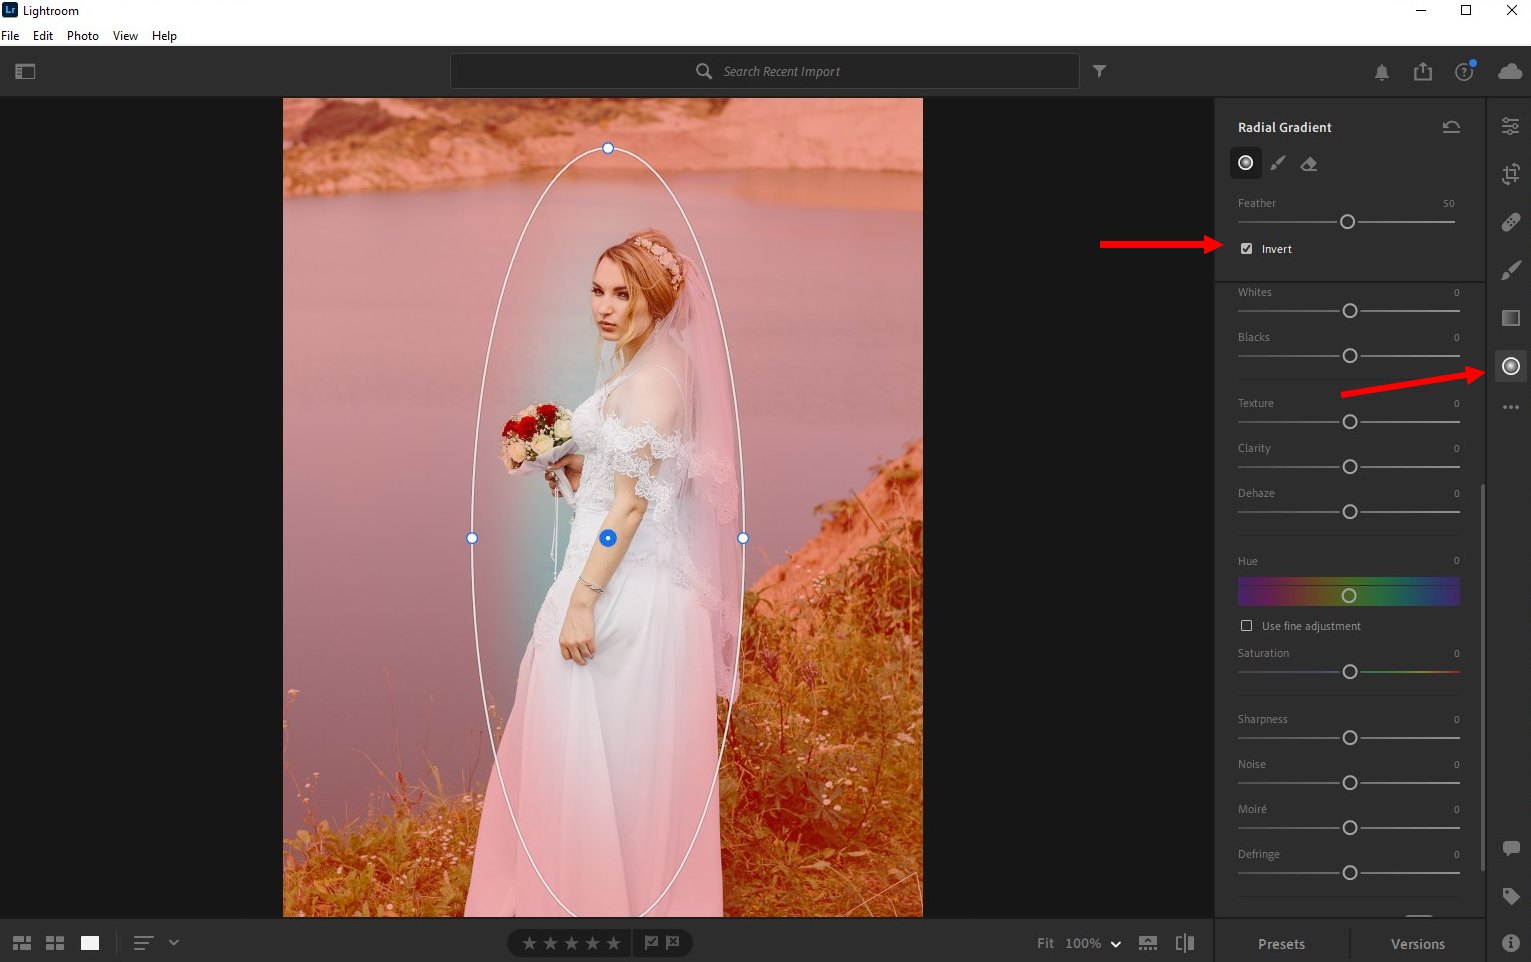
Instead of the Radial Filter tool, you’ll be using the Radial Gradient tool in Lightroom CC to make the selection.
Once the outline is created, make sure to tick the Invert box to flip it to select the background area. Then you can adjust Feather and fix the selection using the Brush tool.
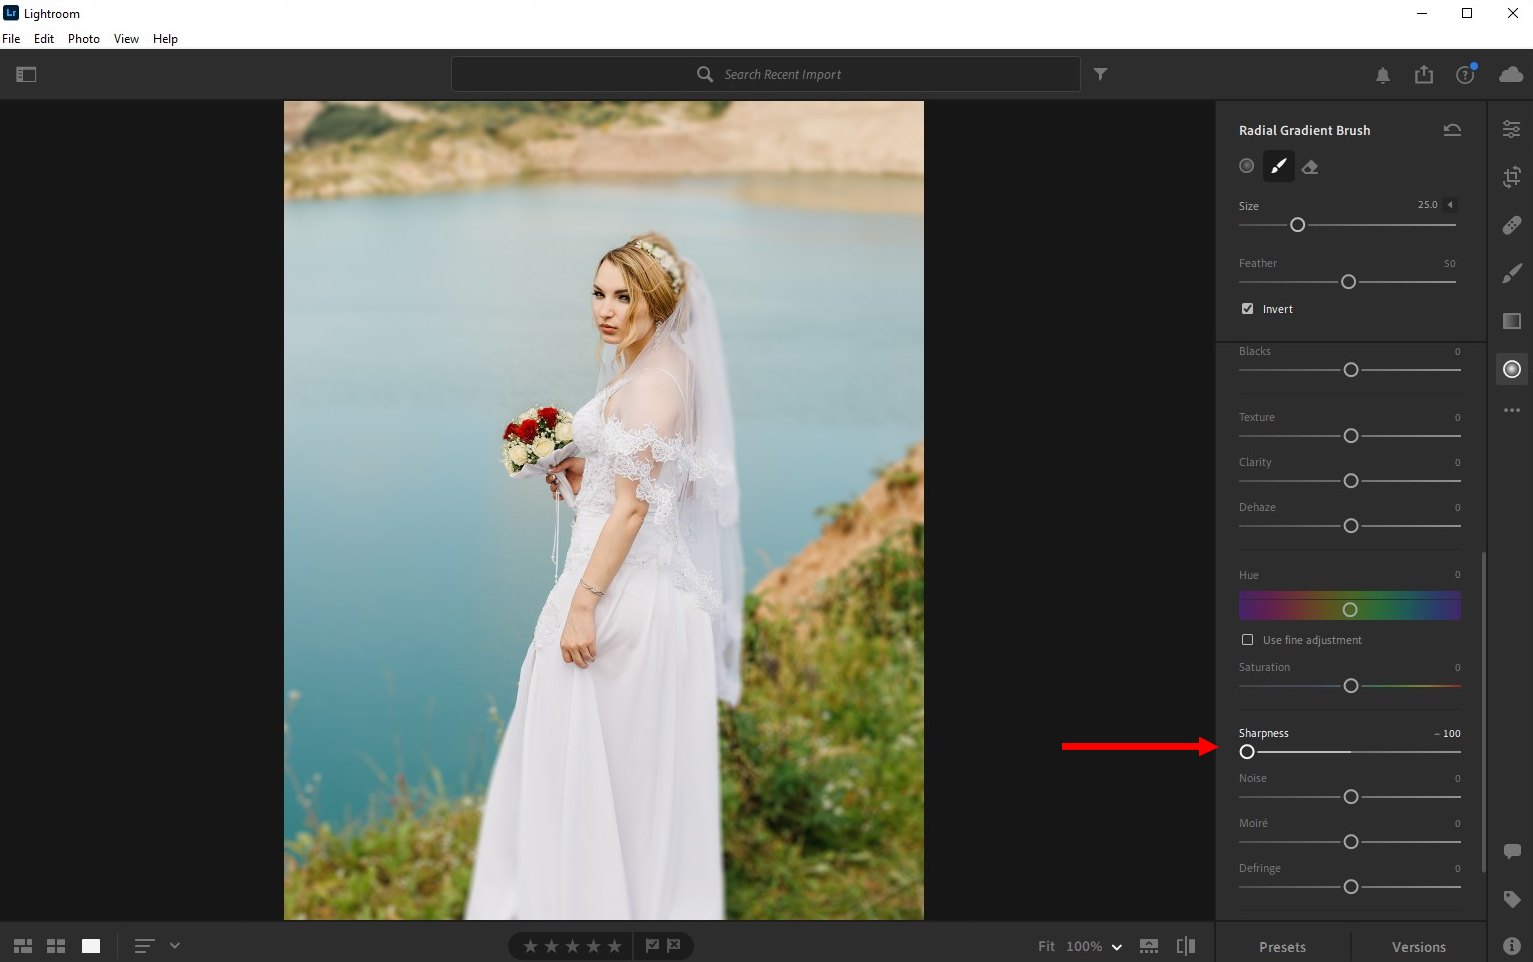
Finally, reduce Sharpness to create the blur effect.
5 Useful Lightroom Portrait Editing Presets
If you’re looking for more ways to enhance and make your portrait photos look professional, here are a few Lightroom presets you must have in your toolkit.
10 Portrait Pro Lightroom Presets
This is a bundle of 10 unique Lightroom presets designed for professional portrait photography. They will allow you to instantly optimize your photos with just one click.
10 Perfect Portrait Lightroom Preset
Another set of portrait presets for Lightroom featuring high-quality optimizations and effects. Perfect for making quick enhancements without effort.
Essential Portraits lightroom presets
Whether you’re aiming to optimize lighting, adjust colors, or apply a trendy filter, this bundle includes a preset for every need. There are 20 Lightroom presets in this pack with different effects.
50 Perfect Portrait Lightroom Presets
With 50 different Lightroom presets to choose from, you’ll have plenty of choices for finding the right preset to improve your photo with this bundle.
50 Wedding Portrait Lightroom Presets
Another big bundle of Lightroom presets. This pack includes presets especially optimized for enhancing wedding photography. They will especially do wonders for portrait photos.
In Conclusion
Lightroom has very limited editing tools so you can only create a simple and subtle blur effect using the app. But it’s more than enough to add a professional touch to your portraits.
For a more advanced blur effect, we recommend using Photoshop. Check out some of the great portrait Photoshop actions to get started.
5 FAQs About Portrait Editing in Lightroom
We also have some space available to answer a few frequently asked questions about Lightroom portrait editing.
Should I Use Photoshop or Lightroom to Edit Photos?
Both Photoshop and Lightroom have their own advantages and benefits. Clearly, Photoshop is the more advanced and suitable option for editing photos. Lightroom, however, is great for processing batch photos. And there are some useful tools available in Lightroom for making simple adjustments and retouching as well.
How to Make Your Portraits Pop in Lightroom?
There are several ways to make portraits pop. One way is to add a blur effect to the background. Follow the step-by-step instructions in our tutorial above to see how it’s done. You can also enhance colors and use filters to make portraits pop.
How Do Photographers Edit Their Pictures?
Professional photographers use a combination of software for editing photos. Photoshop and Lightroom are two main options in their toolkit. There are also alternatives like Capture One that are used for more advanced photo editing.
How to Change Crop from Landscape to Portrait in Lightroom?
This is a common issue most Lightroom users encounter and there’s an easy fix for it. Simply press the X key on your keyboard when using the Crop tool to switch between landscape and portrait modes. Or use the Rotate Aspect Ratio button in the Crop tool panel.
How Do I Use Lightroom for Free?
Lightroom desktop app is only available with the Adobe Creative Cloud software packages. However, you can use the Lightroom mobile for free. It’s available on iOS and Android.
